Monday, April 29, 2013

Top Ten Reasons I Love The Great British Sewing Bee

Ooooh, I haven't kept up here about the Great British Sewing Bee (GBSB). It's been the most fun television program ~ competition ~ reality show that I've ever seen. 
Two of the finalists are shown here.
In no particular order, here are my top ten eleven reasons to love this program, which has been renewed! 
  1. It's about sewing.
  2. It's about garment sewing.
  3. The contestants are all delightful.
  4. The judges are experts in their fields.
  5. The judges are kind and helpful with their comments.
  6. Back to the contestants. They are genuinely interested in focusing on the challenge in front of them.
  7. The narrator, by her commentary, helps viewers to understand the details about what the contestants are doing and why.
  8. The challenges actually relate to garment sewing.
  9. The videography is excellent, frequently zooming in and showing "up close and personal" the stitches and techniques that the contestants are using.
  10. They chose the same person that I would have as the winner.
  11. I love the prize. Just love it.
If you haven't seen this program, all four episodes are on Youtube. Here you go:

Episode 1 Great British Sewing Bee 
Episode 2 Great British Sewing Bee 
Episode 3 Great British Sewing Bee   
Episode 4 Great British Sewing Bee 

Did you watch it? What did you like about it? Please share in the Comments.

Blessings and peace...

Sunday, April 21, 2013

My Review of Sure-Fit Designs

Garment sewing, and in particular, learning how to get patterns that fit my body, has been my greatest sewing challenge in my decades of sewing. I have read just about every book on the subject, taken pattern-fitting classes, attended seminars, purchased computerized pattern systems, and browsed the Internet. Did I miss anything? Even if I haven't listed it here, if it has anything to do with garment sewing and pattern fitting, consider me "Been there, done that."
Used with permission from Sure-Fit Designs
Cowl neck tops, crossover tops, yoga pants, and lots more—these are some of the current fashions you can make.

More than a year ago, based on many reviews and watching videos on YouTube and at Sure-Fit Designs (SFD), I purchased three SFD kits (pants, dress/bodice/skirt, and shirts).  

I am someone who buys or receives something as a gift and then immediately puts it to use, preferably the same day. Somehow, though, I was so lacking in confidence, even of taking my own measurements, that I had the package here, unopened, for all this time. When I received an email from Glenda this winter about classes to learn the SFD system, I decided to go for it. I signed up for both classes: pants fitting and bodice fitting. This is my report. It's all my opinion only; I have no affiliation with SFD or the owner, Glenda Sparling.

I went to Eugene, Oregon, in early April to take these classes. In preparation for the classes, Glenda asked us to watch the DVD that comes with the system (How did she know I hadn't watched it yet? oops!), to view a selection of her videos at the Sure-Fit Designs Learning Center Library, and, if possible, to take measurements and make a muslin.  

I procrastinated getting started until two weeks before departure day (Why? Fear of failure? Fear of disappointment? Yes and yes.) 

Once I started watching the DVD, I thought, "Hey, this makes a lot of sense! I think this is the answer I've been looking for all these years!" I (somehow) found the time to take measurements and make a bodice muslin. I tried it on and my jaw dropped. I couldn't believe it. No kidding. It fit better than any and every thing I've tried to make for myself. Honest to Pete. Not perfect, but the best ever, for me.

So I set out on my travels, arrived in Eugene, met my pre-arranged roommate (Hi, Kay!), picked up our rental car (optional, not really needed), and went to the Residence Inn and checked into our suite. We each had our own bedroom and bath, and we had a common kitchen and sitting room. Nice! 

There were five of us in the class, a perfect class size for this kind of learning, from all over the United States. 

Each day began with a brief presentation, demonstration, and show and tell of garments Glenda has made from SFD. Throughout the week, Glenda was consistently well prepared, knowledgeable, gracious, helpful, kind, and generous. How on earth she was able to keep each student's fitting concerns in mind at all times is beyond me, but she did it! We then set out to work on our task for the morning or day. We gathered again at the end of the day to recap and learn a bit about the plan for the next day.

Have you ever taken a sewing class and felt:

  • Like you spent all your time waiting around for the instructor?
  • Like you didn't get the help you needed?
  • Like you couldn't see or hear what you needed to?
  • Frustrated that the instructor didn't explain things clearly?
  • Like maybe just maybe you were wasting your time and money?
  • Like the class location was severely lacking in good lighting, comfortable seating, and amenities?
Well, over the years, I have experienced all of these things, and then some. But! This was different, really different.
  • At SFD, while we each had to wait for Glenda once in a while, it was never for very long, and there was always something useful to do while waiting.
  • Glenda made sure throughout each day that we felt we were getting the help we needed. She didn't just wait for us to come to her with questions; she moved throughout the classroom from one of us to another, asking how we were doing.
  • The arrangement and class size were such that everybody was just a few feet from Glenda during the presentations and demonstrations, so nobody missed anything, at least I didn't and it didn't seem like anybody else did, either.
  • Glenda is such a well-prepared, knowledgeable, and articulate instructor that I found it easy to pay attention and soak in her insights and wisdom.
  • I prefer to be thrifty with myself so that I can be more generous to others, so taking this class, especially when you add in the cost of travel and hotel, was a big expenditure for me. Was it worth it? Absolutely yes!
  • Oh and the class location, Our Sewing Room, more than exceeded my expectations. Nice, high cutting tables. Lots of great lighting. Comfy chairs. A kitchen with coffee, tea, refrigerator, and microwave. Lovely, just lovely.
Okay, down to business. What is it about SFD that sets it apart? I think of it like this: buying a pattern (Vogue, Butterick, McCalls, and Simplicity are the "Big Four"; and independent pattern companies from around the world) and changing it to try to make it fit me is like trying to fit a round peg into a square hole, whereas with SFD I am fitting a round peg into an almost exact duplicate round peg. The modifications needed after the initial creation of my “blueprint” are truly minor. That means that I have created my own blueprintfrom which I can make anything!

I had no confidence in my ability to take my own measurements, so imagine my surprise when the measurements taken in class (we used a buddy system and then Glenda came around and checked every single measurement) were very close to those I took at home! So I’ll pause here and say this: If you have the SFD kit(s) but haven’t gotten started with it yet, go for it! Do it! You will be most pleasantly surprised at the results! Watching the DVD and the online videos helped me a lot.

Many figure variations and fitting concerns were represented in the group, and I believe that everyone left completely satisfied. 
 
Glenda makes herself so available (by email, phone I think, and Skype) to help with any questions that you have, whether you take a class or buy a kit.

Finally, I make four recommendations: 
  1. If you already own the SFD kit(s) but haven’t gotten started yet, unpack it, watch the DVD and online videos and get started, even if you don’t have a sewing friend to help you to take your measurements. But maybe I'm the only one who bought it but didn't use it for (ahem) some time?
  2. If you have gotten started with SFD but haven’t used it in a while, dust it off and start using it again. 
  3. If pattern fitting has been holding you back from making clothing, consider purchasing one or more of the kits.
  4. If you have the opportunity (time and money) to take classes with Glenda, I think that you will be delighted with the experience.
As Glenda says, “No matter your shape and size...you can achieve amazing personalized fit!”

I welcome your feedback about this review. Thanks; you know I love to hear from you!

Excuse me but I have to go sew my yoga pants now… from my SFD pants kit.

Blessings and peace...

Friday, April 5, 2013

The Great British Sewing Bee - WOW

I'm practically famous! Oh yes indeed! Well, that's how it feels anyway. Here are the contestants for a new television program. No, wait. It's not like the others. Really. I promise.

It's called Great British Sewing Bee, and I just finished watching the first episode. It's a BBC program that isn't broadcast in the United States. A sewing friend sent a link to the first episode on Youtube: Great British Sewing Bee Season 1 Epi 1 . My connection to fame? Well, Ann Rowley (lovely lady on the far right in this photo) is a valuable and always helpful member of my favorite sewing forum. I have learned so much from her. Spoiler alert: She shines in the first episode in which the contestants complete three sewing projects.

Oh and here are the profiles of the contestants. From Ann's profile:

Sewing has always been a part of Ann’s life, "I can’t imagine life without sewing. It’s a part of me". She goes "snoop shopping" when she visits the shops to get ideas for her own creations. One of her grand-daughters has started sewing which Ann is thrilled about. She hopes that by taking part in The Great British Sewing Bee she will inspire the next generation of sewers.

Congratulations to Ann on being one of 8 of the 1500 who tried out for this program. I'm looking forward to next week's episode. Oh, by the way, the contestants are all very nice; the judges are knowledgeable and kind; and the commentator enriches the program by asking and explaining many of the sewing terminology and processes. No crazy wild drama in this program -- yea! I have a feeling I'll have another post or two about this program.

As far as I know, Ann doesn't have a blog, but she has photos of her beautiful work here

And as for me and my sewing, I'm off to Oregon for a week of sewing pattern fitting classes. Color me happy happy happy!

P.S. Have you watched the first episode of the GBSB yet? What do you think of it? Would you want to be a contestant? How would you have tackled those first three projects?
  
Blessings and peace...

Friday, March 22, 2013

Answer and What's In My Mental Junk Drawer

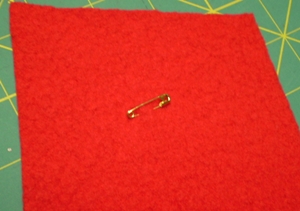
The answer to my question from my previous post is: It's a camera stand that my husband made for me, taking pictures of, well, my camera in the camera stand (in a mirror). LOL


The red felt covered pieces really help the camera to fit snugly, even at an angle. I am very happy with it, even though I haven't used it.

Do you have a drawer with all kinds of stuff in it, never sure what's in there and where the contents should really be? I am always decluttering, so I don't really have one of these. However, I have a mental junk drawer, and here are a few things that are on the top layer:

  • Since I last wrote, I am not on my computer very much. I use my iPad to check email and bounce around the Internet and Facebook. It doesn't seem possible to submit blog posts via my iPad (plus my photos are on my computer). As I might have mentioned, I retired last spring. This past year has been a transition in some unexpected ways (not bad, not good, just different), and I don't feel like I'm finished with it yet. One thing I've learned/realized is that ::shock:: I am the same person I was when I was working ::shock:: LOL
  • The sewing part of my life has consisted mostly in squares and rectangles, and let's face it, who wants to see photos of napkins I've made out of fabric originally intended for a Christmas tree skirt? My sewing has bored even me, and believe me, I am not easily bored. Ask anybody who knows me. Being bored and being boring are two completely different things. I'm sure some people find me boring. Onward.
  • The other part of my sewing life has been watching a DVD and some online tutorials in preparation for my upcoming SureFit Designs classes. Now, THIS is exciting! I'll be going to Eugene, Oregon, for 6 days of classes, learning and fine-tuning the fit of my SureFit patterns. The cost including classes, airfare, hotel, and rental car is just ridiculous. I could not justify it to anyone. On the up side, I don't have to. If I had to, I could say that I already have the fabric for the muslins (from one of Fabric Mart's bundles that I purchased last year).
  • If my classes are successful, and I am defining success as I will be able to make a pair of pants and tops that fit (and flatter? okay, I'll settle for fit) with only minor alterations. Wild success is defined as I will also be able to make design changes to the patterns. And if my classes are successful, I will definitely have sewing things to write about. Stay tuned.
  • My quiet time is about to end; my husband will be returning shortly. He's been enjoying walking without having to pile on outerwear; going to spring training baseball games; and missing me.
  • Dear Apple, why oh why did you go backward in technology with the iPad mini? I really want an iPad mini; it will fit in my purse so much better than my iPad. I'll buy the next version of iPad Mini -- if and only if it has the retina display of my iPad 3 (and 4). My husband has been waiting patiently, knowing that he will inherit my iPad; in the meantime, he has been reading his email and browsing the Internet on his iTouch. Really, now, that's just not right.
  • I have dedicated a lot of time, thought, prayer, and activity to Lent this year. It is so worth it.
  • My heart is so full of gratitude for the service of now Pope Emeritus Benedict XVI, with whom I share a birthday. (I'm the younger one. Like that's the only difference.)
  • It's beginning to look a lot like Christmas out there, and it's March, people (and Mother Nature). I am ready for some nice weather. By nice, I mean at least 50 degrees, 60 would be better, and 70 would be just lovely. My winter gloves are wearing out; I need to replace them, but the selection of leather gloves in our local department stores is understandably pretty limited. And I can't buy gloves without trying them on. Plus, it's gardening gloves that are in every store these days.
  • After scraping the texture from the textured ceiling in the downstairs bathroom, I've decided that actually, the textured ceiling in the adjacent family room in fine, really. No need to tackle that project. The next owners can do that. Not that we're planning to move in the near future.
  • My search for the perfect purse continues.
  • If I (we) move to another city, it will have to be one that has a Nordstrom within driving distance.
  • I was just not able to maintain my fat-free vegan diet while on vacation, and I haven't gotten fully back on board since then. I'm thinking of calling a friend to see about going out for a fish fry tonight.
  • Oh dear. I colored my hair. The result was surprising, and I was not hoping for a surprise. I then bought a product called Color Oops, which removed much of the pink tones. I am left with a shade of orange that I have not admired when I've seen it on other women. Oh dear.
  • Does reversing two chairs seem like an easy-peasy task? Somehow it's not. Because it's not just the chairs; it's everything around both of them.
  • I saw a pair of earrings at Nordstrom and, while I liked them (A LOT), I thought they might be too fancy. I've since decided that a little bit of fancying up is just what appeals to me.
  • Oh and I would have thought that spamsters would choose more active blogs to post their spammy comments. Not very savvy of them. 


Blessings and peace... 

Sunday, January 27, 2013

January Thaw

Alrighty then.

Christmas has come. All 12 days of Christmas, during which I had a contest over on Facebook, all about, well, the Twelve Days of Christmas! The decorations have been put away, the January light cleaning and restoration of law and order in the household has been completed, and I am in the middle of a major paper decluttering project.

Which makes it a perfect time to show you what Louie made for me:
The first four are of the view from the top, and the fifth, the view from the side. This is exactly what I asked Louie to make me. It didn't matter to me that it wasn't painted or that the hardware doesn't match. It is perfect for the intended purpose. Can you guess what it is? I had a contest over on Facebook, starting yesterday, and it took people a while—and many guesses—to figure it out.

You probably see the ruler on the third picture. That's a big clue. Do you want to guess or do you want me to tell you what it is?


Blessings and peace...

Thursday, December 20, 2012

Cranberry Apple Sauce

I made a pretty, nutritious, and yummy side dish that you might want to make to serve at Christmastime. There are only four ingredients: cranberries, apples, cinnamon (optional), and sweetener. So maybe only three. I used my Vitamix and my crockpot, but the recipe could be adapted to leave out the apple peels and hand chop the apples and cranberries, and it could be cooked on top of the stove (or not cooked at all). Another adaptation is to vary the proportion of ingredients, using more or less cranberries/apples, according to taste preference or what you have on hand. I love recipes that can be made in whatever way works for me.

Ingredients:
4 cups cranberries, fresh or frozen, washed
12 small or 8 medium or 6 large apples, washed and cored
Sweetener

First, I washed the cranberries.
Then I washed and cored the apples.
I peeled the apples.
I measured the peels: 2 cups.
I Vitamixed them with a little water. Time: about 10 seconds.
I added the cranberries and Vitamixed them, too. Time: about 15 seconds.
I rough chopped the cored and peeled apples and placed them in a crockpot. I added the apple peel and cranberries mixture. I added two sticks of cinnamon after I took this picture. I cooked on low for about an hour.
I removed the cinnamon sticks, added some sweetener to taste, stirred, and spooned some into a dish. Would you like to try some? I put one container of it in the freezer to take with us on Christmas when we will have dinner with dear friends.

p.s. Two quick things about my Vitamix: 1) I was able to minimize waste and optimize nutrition by using my Vitamix to puree the apple peels and 2) it takes about 20 seconds to clean the Vitamix. Really. After I give the container a quick rinse, I put some warm water and a couple of drops of dishwashing liquid (note: not dishwasher detergent), putting on the cover and placing it back on the stand, turning it to High, and Ta Da! It's clean. Rinse and air dry. It is cleaner than if I hand washed it.

Disclaimer: I am an approved affiliate for Vitamix. You can get free standard shipping and handling (a $25 US/$35 CN value) by purchasing through Vitamix and using code 06-007841 when placing your order.

Blessings and peace...

Tuesday, December 18, 2012

Vogue 7281 Vest - Part 2

I was doing pretty well for a while.  I cut binding strips 2 in. wide and the width of the binding fabric. I attached the binding as follows:
Secure (with pins or clips) the binding
right sides together along the raw
edge of the fabric.
Stitch 1/2 in. from edge. Steam and
hand press, then fold the binding, wrap
it around the raw edge, and secure.
Secure the wrapped binding on the
right side.
Here's how it looks from the wrong side.
Stitch from the right side, very close to
the binding.
Trim close to stitching on the wrong side.
Please feel free to appreciate that I changed
the bobbin thread to match the binding. Never
mind that it will never be visible, which I
thought it would, at that point in the process.
On the right side of the "under"
piece that will be overlapped
by a piece with a bound edge, mark
seam allowance (soap sliver).
The piece on the left is ready to be
overlapped onto the piece on the right.
Stitch overlapped seam close to
binding. I used my #10 edge foot.
That's the part that went well. Are there any emoticons here in bloggerland?

I then made every sewing mistake imaginable and then some. Well, almost every mistake possible. Here are a few:
  • I neglected to add seam allowances to vertical seam under pieces. The effect was that it made sewing the overlapped front and back almost impossible. I had to redo parts of each seam at least three times. Have you removed stitches from spongey fabric lately? Oh and I lost about 2 inches in the circumference of the vest. Well now it will be cozy, that's for sure.
  • I somehow thought that one of the side pieces was all wrong, so I was able to eke out a new {ahem} corrected one from the little bit of remaining fabric. The real problem was that there was nothing wrong with the piece I replaced. And, the new one was for a different pattern piece. I had to put the original piece back in and all was well. Except for my psyche.
  • I forgot to change the needle position, more than once. 
  • I forgot to change the stitch length, more than once. 
  • I ran out of bobbin thread at the beginning of a seam that I was stitching for the second or third time. 
Then I pinned the side and shoulder seams and tried it on. All I could think of was... The Jetsons. Does anybody remember that super-futuristic family cartoon from when, the 60s maybe? Anyway, here's an image I found of Jane:

Please note in particular the wide shoulder wings (as in airplanes not angels). In this case, it's a collar; but Jane Jetson always sported that neckline.

Well. It's my own fault. I didn't take into account that this felted fabric does not have the drape of oh, say, the vest made up and photographed on the pattern envelope. Oops. In other words, the shoulders just keep going and going.

So, in addition to all of my technical errors, I spent more time than you would believe clipping, trimming, trying on, noting changes on pattern pieces, {lather, rinse, repeat}. This is a small portion of what I cut off and disposed of:
Well, I am now back on track. I have stitched and top stitched the shoulder and side seams. Next will be adding binding all around. Oh, I have a question. Do you have any suggestions for handling the binding at the corners:
These corners, marked by green circles
This vest is not a difficult pattern or project. It's just that it's full of operator errors. On the up side, I am a persistent person, and it takes a lot for me to abandon a project.

I will have a vest to wear. And now I've decided that I will wear it on Christmas, just in case I start to get any ideas of setting it aside for a while. Which I might already have thought of. A hundred times.

Blessings and peace...

Sunday, December 16, 2012

Vogue 7281 Vest - Part 1

I've started a new sewing project, a vest for myself, out of some red wool that I "felted" (technically, it's "fulled") in the washing machine and dryer. I've added lines to the seams and armholes to show where I am planning to finish the edges with some brown wool. Here's what it might look like when completed:
And here's the pattern envelope:
When cutting out and pressing the pattern pieces, I noticed that the front and back pieces are not multiple pieces but that the shaping from the shoulder down and from the hips up, front and back, are from (oh no) darts.
Pattern pieces
So I cut the pieces apart in a way that accounts for the darts and added seam allowances, creating a princess seam vest, which is what I thought it was.
And here's my fabric all cut out:
Thanks, Maxwell, for holding down those pattern pieces. You never know when a gust of wind might blow everything around.

Here's the fabric:
Felted wool on left, new wool on right
Here's a close up to show the thickness:

This vest should be nice and cozy.

I always mark the right side of each piece after it's been cut out. The placement is determined by the fabric; sometimes the mark needs to be in a seam allowance. But for this project, any place is fine. I leave this mark in as long as possible, sometimes until the section is pressed.
I use small safety pins, clips, sticky dots, whatever is on hand that will work for that project.

I'll let you know how it's going. There's been some Santa's Workshop activity here, too, so progress might be even slower than usual.

Blessings and peace...

Tuesday, December 4, 2012

Sewing Some Charm Ornaments and Cat Toys

It's all Ruthie's fault. She put the Christmas hearts idea in my mind. Then, I knew I wanted to make this...
...as soon as I saw this pewter charm at Sew Thankful last week.
It's about 3/4 in. across.
I bought six gold tone and six silver tone charms. They are sold out now, but if you do a search for nativity scene charm, you'll get plenty of results at a wide price range. Or you could use any other charm – or no charm at all – to make these sweet ornaments.

For the charm ornaments, I gathered my supplies, clockwise from the top:
Plaid flannel fabric left over from table linens made for a baby shower this summer
Red felted wool left over from dining room chair pads I made a few years ago
Green/red/gold ribbon
A heart-shaped cookie cutter
(Not shown: small pieces of white/pastel cotton flannel plus the usual sewing supplies)
I made a paper pattern from the cookie cutter for the heart shape. I used a plastic lid for the ornament shape to which I added a rectangle shape at the top and a slightly smaller plastic lid for the white flannel.

For Each Ornament
Cut out one heart shape from the red wool, two ornament shapes from the plaid flannel, and two circles from the white flannel. Cut 1 piece of ribbon 6 in. long.

Hand sew the charm to the felt heart.

I was having a bit of trouble tying the knot on the back because everything was so small and light. Until I set a pattern weight on the plaid flannel to hold it in place while I tied the knot.
Place the heart onto one plaid flannel ornament so that the charm is aligned with the little rectangle at the top. Using any decorative stitch, stitch the heart to the plaid flannel. I used two threads together in the top so that the stitches would stand out, and I used stitch #26 on my Bernina 1130, increasing the stitch length to 3 and setting it to mirror image. (Please pardon my too-detailed information here. I might want to make these again some day!)
Place two layers of smaller white flannel in the center of the second plaid flannel ornament shape and stitch around.
Place the "charmed" heart embellished plaid flannel onto the plaid flannel that has the white flannel circles so that the white circles are on the inside.

Fold the ribbon in half and insert it between the layers of plaid flannel, at the top little rectangle. Stitch all the way around all the layers as close to the edge as is easy.
I used all of the charms – some to keep and some to share.

Cat Toys
I exchange a small Christmas gift with my friend Mariquita every year and always include something handmade for her kitties. She has two young Ragdoll kitties that I will see for the first time when I visit next year. I'll be sending Mariquita one of the nativity scene ornaments and these for the kitties:
I gathered my supplies:
Two 4-in. square pieces of blue felt left over from a jacket I made some time ago
Red felted wool small scraps left over from the nativity scene charm ornaments
Two squares of TP
Small amount of catnip
Usual sewing supplies

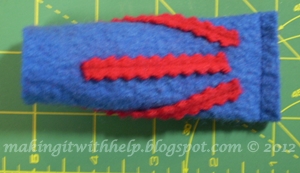
First, use your zigzag (or plain) rotary cutter (or scissors) and cut a few thin strips from the red wool. Straight stitch them onto the blue felted wool in no particular pattern but keeping them 1/2 in. away from the edges.
Fold the embellished square in half, with the embellishment on the inside.
Stitch a 1/4 in. seam along the long open side.
Press open.
Turn right side out. Sew across one end.
Place a small amount of catnip on a square of TP.
Fold to enclose the catnip.
Slip the little packet of catnip into the opening. Turn the blue "tube" 1/4 turn, then insert the end of a ribbon and stitch across. That looks kind of like a mouse, doesn't it? If you squint your eyes almost closed and then turn off the lights? I happen to know a few other kitties that might like these.


I hope you enjoy reading about my (sometimes very little) sewing projects, and that they will inspire you to make something easy, simple, fast – if you feel like it, that is.  


Blessings and peace...