Showing posts with label Wool. Show all posts

Tuesday, December 18, 2012

Vogue 7281 Vest - Part 2

I was doing pretty well for a while.  I cut binding strips 2 in. wide and the width of the binding fabric. I attached the binding as follows:
Secure (with pins or clips) the binding
right sides together along the raw
edge of the fabric.
Stitch 1/2 in. from edge. Steam and
hand press, then fold the binding, wrap
it around the raw edge, and secure.
Secure the wrapped binding on the
right side.
Here's how it looks from the wrong side.
Stitch from the right side, very close to
the binding.
Trim close to stitching on the wrong side.
Please feel free to appreciate that I changed
the bobbin thread to match the binding. Never
mind that it will never be visible, which I
thought it would, at that point in the process.
On the right side of the "under"
piece that will be overlapped
by a piece with a bound edge, mark
seam allowance (soap sliver).
The piece on the left is ready to be
overlapped onto the piece on the right.
Stitch overlapped seam close to
binding. I used my #10 edge foot.
That's the part that went well. Are there any emoticons here in bloggerland?

I then made every sewing mistake imaginable and then some. Well, almost every mistake possible. Here are a few:
  • I neglected to add seam allowances to vertical seam under pieces. The effect was that it made sewing the overlapped front and back almost impossible. I had to redo parts of each seam at least three times. Have you removed stitches from spongey fabric lately? Oh and I lost about 2 inches in the circumference of the vest. Well now it will be cozy, that's for sure.
  • I somehow thought that one of the side pieces was all wrong, so I was able to eke out a new {ahem} corrected one from the little bit of remaining fabric. The real problem was that there was nothing wrong with the piece I replaced. And, the new one was for a different pattern piece. I had to put the original piece back in and all was well. Except for my psyche.
  • I forgot to change the needle position, more than once. 
  • I forgot to change the stitch length, more than once. 
  • I ran out of bobbin thread at the beginning of a seam that I was stitching for the second or third time. 
Then I pinned the side and shoulder seams and tried it on. All I could think of was... The Jetsons. Does anybody remember that super-futuristic family cartoon from when, the 60s maybe? Anyway, here's an image I found of Jane:

Please note in particular the wide shoulder wings (as in airplanes not angels). In this case, it's a collar; but Jane Jetson always sported that neckline.

Well. It's my own fault. I didn't take into account that this felted fabric does not have the drape of oh, say, the vest made up and photographed on the pattern envelope. Oops. In other words, the shoulders just keep going and going.

So, in addition to all of my technical errors, I spent more time than you would believe clipping, trimming, trying on, noting changes on pattern pieces, {lather, rinse, repeat}. This is a small portion of what I cut off and disposed of:
Well, I am now back on track. I have stitched and top stitched the shoulder and side seams. Next will be adding binding all around. Oh, I have a question. Do you have any suggestions for handling the binding at the corners:
These corners, marked by green circles
This vest is not a difficult pattern or project. It's just that it's full of operator errors. On the up side, I am a persistent person, and it takes a lot for me to abandon a project.

I will have a vest to wear. And now I've decided that I will wear it on Christmas, just in case I start to get any ideas of setting it aside for a while. Which I might already have thought of. A hundred times.

Blessings and peace...

Sunday, December 16, 2012

Vogue 7281 Vest - Part 1

I've started a new sewing project, a vest for myself, out of some red wool that I "felted" (technically, it's "fulled") in the washing machine and dryer. I've added lines to the seams and armholes to show where I am planning to finish the edges with some brown wool. Here's what it might look like when completed:
And here's the pattern envelope:
When cutting out and pressing the pattern pieces, I noticed that the front and back pieces are not multiple pieces but that the shaping from the shoulder down and from the hips up, front and back, are from (oh no) darts.
Pattern pieces
So I cut the pieces apart in a way that accounts for the darts and added seam allowances, creating a princess seam vest, which is what I thought it was.
And here's my fabric all cut out:
Thanks, Maxwell, for holding down those pattern pieces. You never know when a gust of wind might blow everything around.

Here's the fabric:
Felted wool on left, new wool on right
Here's a close up to show the thickness:

This vest should be nice and cozy.

I always mark the right side of each piece after it's been cut out. The placement is determined by the fabric; sometimes the mark needs to be in a seam allowance. But for this project, any place is fine. I leave this mark in as long as possible, sometimes until the section is pressed.
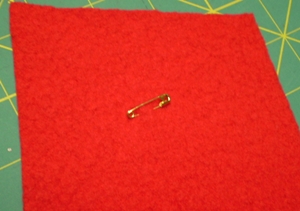
I use small safety pins, clips, sticky dots, whatever is on hand that will work for that project.

I'll let you know how it's going. There's been some Santa's Workshop activity here, too, so progress might be even slower than usual.

Blessings and peace...

Saturday, November 17, 2012

Easy No-Knit Yarn Cowl

I saw a tutorial for another cute cowl and thought I'd give it a whirl. This one is for a friend whose birthday we're celebrating tomorrow. It's five or six "braids" of yarn, each braid being made up of 3 sets of 8 strands of yarn, 40 inches long, then braided. Here's my end result:
The full tutorial is here. Please go take a quick look at her pretty blue cowl, then come right back, okay?

I ran into a bit of trouble with my first attempt, which resulted in this:
My wrapped section is about
three times what it should be.
Okay, I have more yarn. And my friend probably likes red better, anyway. I didn't see a way to end up with the desired result following the instructions, so I modified it a bit.

Instead of cutting 120 or 148 40-inch long strands of yarn, then combining them into groups of 8 strands, then each 8-strand each of which becomes one -- oh I can't do this math again.

Anyway, I decided to make one very long braid, then wind it around five times. Each strand started out about 15 feet long. Go ahead, laugh at me; think about braiding someone's hair that is so long that you are in different rooms for the last third. Oh and think about when you're braiding something really long, the "unbraided" sections are, in fact, braiding themselves. So you have to -- at the same time that you're pinching the braid, unbraid the lower portion. Ay-yi-yi.

Here are my 3 sets of 8 strands of yarn:
And a close up of one:
And because I knew that the instruction in the original tutorial, to tape the strands down to your work surface, would not hold for me, I knotted the ends of each strand and used binder clips:
And clipped them tightly:
And then I hung the binder clip on a pegboard clip:
I then started braiding. And braiding. And braiding. Then I wrapped it around five times, machine-stitched the braids together, used a bit of red duct tape to cover the ends, and wrapped yarn around the duct tape. The result:
I think she'll like it. I'm going to make one for myself, but it will be when I have a helper, someone who can unbraid the lower ever-getting-more-tangled part while I'm braiding away.

Is it worth your time to see someone's real-life experience following a tutorial? What do you like about it?

Oh, and is anyone interested in some dark orange (official color name Paprika) braids? And the rest of the ball of yarn, too. It's Paton's worsted weight wool. For a doll? Or a costume? I'll give them to the first person to request them in the Comments.

Blessings and peace...