|
| Secure (with pins or clips) the binding right sides together along the raw edge of the fabric. |
 |
| Stitch 1/2 in. from edge. Steam and hand press, then fold the binding, wrap it around the raw edge, and secure. |
 |
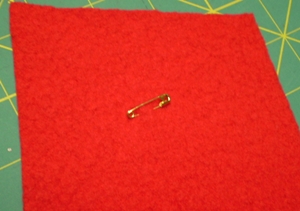
| Secure the wrapped binding on the right side. |
 |
| Here's how it looks from the wrong side. |
 |
| Stitch from the right side, very close to the binding. |
 |
| Trim close to stitching on the wrong side. Please feel free to appreciate that I changed the bobbin thread to match the binding. Never mind that it will never be visible, which I thought it would, at that point in the process. |
 |
| On the right side of the "under" piece that will be overlapped by a piece with a bound edge, mark seam allowance (soap sliver). |
 |
| The piece on the left is ready to be overlapped onto the piece on the right. |
 |
| Stitch overlapped seam close to binding. I used my #10 edge foot. |
That's the part that went well. Are there any emoticons here in bloggerland?
I then made every sewing mistake imaginable and then some. Well, almost every mistake possible. Here are a few:
- I neglected to add seam allowances to vertical seam under pieces. The effect was that it made sewing the overlapped front and back almost impossible. I had to redo parts of each seam at least three times. Have you removed stitches from spongey fabric lately? Oh and I lost about 2 inches in the circumference of the vest. Well now it will be cozy, that's for sure.
- I somehow thought that one of the side pieces was all wrong, so I was able to eke out a new {ahem} corrected one from the little bit of remaining fabric. The real problem was that there was nothing wrong with the piece I replaced. And, the new one was for a different pattern piece. I had to put the original piece back in and all was well. Except for my psyche.
- I forgot to change the needle position, more than once.
- I forgot to change the stitch length, more than once.
- I ran out of bobbin thread at the beginning of a seam that I was stitching for the second or third time.
Then I pinned the side and shoulder seams and tried it on. All I could think of was... The Jetsons. Does anybody remember that super-futuristic family cartoon from when, the 60s maybe? Anyway, here's an image I found of Jane:

Please note in particular the wide shoulder wings (as in airplanes not angels). In this case, it's a collar; but Jane Jetson always sported that neckline.
Well. It's my own fault. I didn't take into account that this felted fabric does not have the drape of oh, say, the vest made up and photographed on the pattern envelope. Oops. In other words, the shoulders just keep going and going.
So, in addition to all of my technical errors, I spent more time than you would believe clipping, trimming, trying on, noting changes on pattern pieces, {lather, rinse, repeat}. This is a small portion of what I cut off and disposed of:

Well, I am now back on track. I have stitched and top stitched the shoulder and side seams. Next will be adding binding all around. Oh, I have a question. Do you have any suggestions for handling the binding at the corners:
 |
| These corners, marked by green circles |
This vest is not a difficult pattern or project. It's just that it's full of operator errors. On the up side, I am a persistent person, and it takes a lot for me to abandon a project.
I will have a vest to wear. And now I've decided that I will wear it on Christmas, just in case I start to get any ideas of setting it aside for a while. Which I might already have thought of. A hundred times.
Blessings and peace...